Who says instrument and autopilot installation is hard?
I suppose that depends on what you mean by “hard”. For us, it was challenging to think through all the pieces and how to best install the system on our boat. It was also challenging to squeeze into small spaces with awkward-sized, somewhat-heavy items. Perhaps the most challenging aspect was figuring out how many fasteners of the right size, head-type and length we needed (of the 4,000 fasteners I must have purchased, we used approximately 25% so we now have at least 100 pounds of extra weight onboard, in large nuts & bolts). I have no idea how we would have done this without Fawcett’s, given their apparently magical basement of special fasteners of all sizes and shapes….we would describe what we needed, and the person would disappear and reappear with exactly what we wanted!
Our chosen system was NKE to replace the aged Raymarine ST80 instruments and autopilot, although we intended to keep the old autopilot installation intact (as much as possible) as a backup. Justin has been convinced of the high-quality and robustness of NKE autopilots for a few years now, given the use of the system on Vendée Open 60 racing sailboats. Even better, we had one of the best companies in the marine industry to work with: PYI, Inc. in Seattle. Years ago, Justin worked for PYI, and he has kept in touch with them. True to form, they’ve been an incredible source of information and support, including helping us engineer and machine a sturdy mounting bracket for the autopilot ram.
For several months, Justin had been working out the details of getting NKE instruments purchased and sent to our special holding facility (thanks, Mom and John!).

When I arrived at Mom and John's house, I found this on the front door. Really, the boxes only took up the living room, dining room and basement. And just a corner in the guest room! Sheesh...
I had been reading the NKE installation and operating manuals, which frankly, were nowhere as good as reading the Hunger Games trilogy. However, by the time April had rolled around, Justin and I were both talking coherently about how we envisioned the system being installed and a logical sequence for steps involved with the installation, so the dry reading was time well spent.
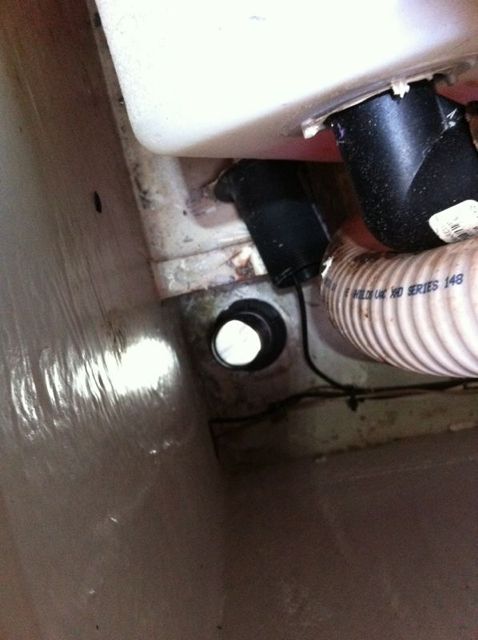
After getting the bottom finished on the boat, my focus shifted to installing a new transducer for the NKE depth sensor because the old depth transducer had not required a thruhull fitting. Luckily, the existing Raymarine speed sensor’s thruhull fitting would work perfectly with the new NKE sensor, so all I had to do was a quick removal and reinstallation, using the silicone grease provided with NKE. We decided to locate the new depth thruhull just opposite of the speed transducer, along the centerline of the boat because of the relatively easy access under our v-berth. I drilled the 2” hole and installed the thruhull using Boatlife Life-Caulk…and then spent the next couple of nights wondering if the install would be leakfree when the boat launched…and how our other thruhulls and seacocks had been installed. There’s nothing like actually drilling holes in your boat to make you suddenly suspicious of the other holes in your boat.
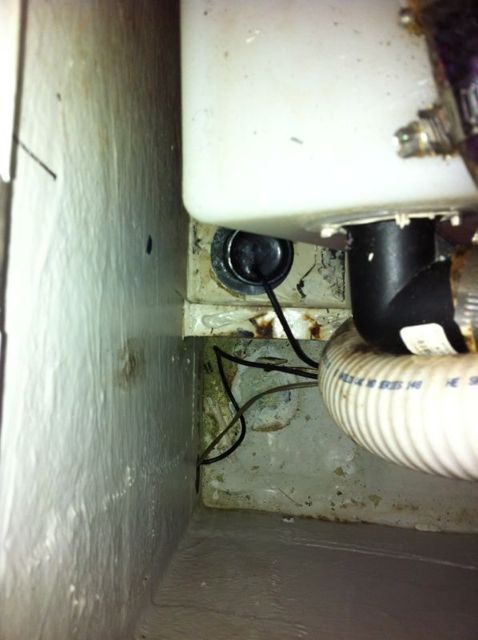
The old Raymarine depth sensor which did not require a thruhull. This is located under our v-berth, next to the holding tank.
Thruhull installed, I spent the next day running wires and removing wires from the old speed and depth instruments, as well as the new Regatta compass unit. I also removed the old display units (our previous owner, a competitive racer, had 6 along the companionway, with 2 removable large-format displays that had been attached to the mast). After removing the display units, we were a bit sad to see that although the displays had been surface-mounted, the access holes were HUGE. Our new system has three display units, so they would not cover the holes, by any stretch of the imagination.
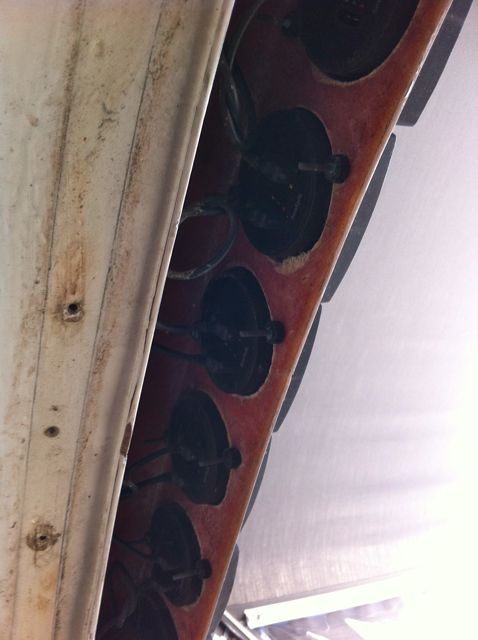
This picture shows the backside of the top of our cabintop front, where the instrument displays are mounted. Note that the holes through the fiberglass are BIG.
I wandered up to one of the shops in the yard (Bert Jabins), and happily found Ted at Seaside who looked carefully at the cardboard template that my mom had cheerfully made for me of the companionway section that would house the units before telling me, “No problem.” He found a piece of Starboard in his pile of stock, and I watched him fabricate a new instrument panel in less than a half-hour in a pretty nifty shop with every tool that you could ever want for boat projects. I paid him $30 and trotted back down to the boat, where I finished our display installation, including a several-hour ordeal with wiring under the headliner where I discovered evidence of past leaks that we’ll need to address later (lovely…finish one task, add three more!).
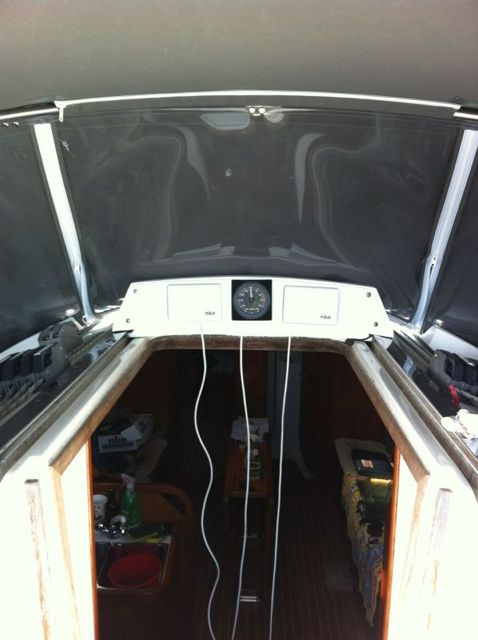
Our new display units are mounted on the cabintop against the Starboard panel. Much better! Note: I sent this picture to Justin, and his response wasn't exactly what I expected...he wanted to make sure I was planning to do SOMETHING with those wires! Duh. I never liked those doorways with beads that they had in the 1970's anyway.
After getting most of the instrument wiring led, I installed the first bus under the seat in our quarterberth and then moved it into the quarterberth closet when I realized the display wiring would not quite reach our first choice of bus location. I installed the antenna and radio transmitter that will allow the wireless autopilot remote to talk to the instruments and then turned my attention to the tasks that Justin had requested for the autopilot install. I was not particularly excited about the autopilot install – likely a bit intimidated by the 20-lb. hydraulic ram unit with a strange-looking pump unit complete with fluid, and then the array of stuff that supported the ram and pump…a rudder reference unit, the autopilot display unit, another bus, an autopilot “computer” that needed to be mounted, a converter unit, and a beefy-mounting set-up that PYI had fabricated for us.
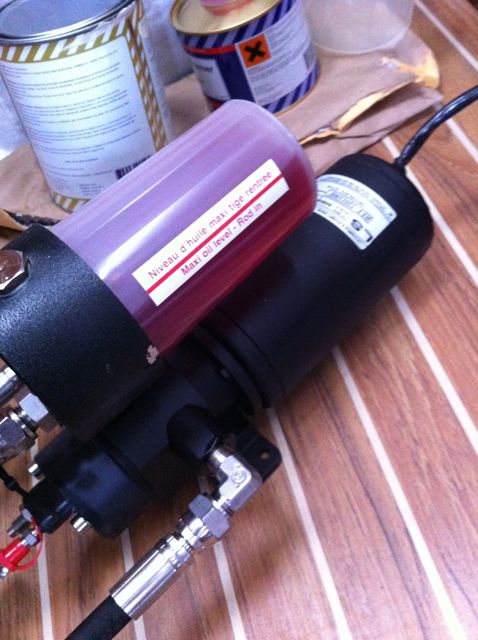
This pump is attached to the big autopilot ram arm that somehow I forgot to take a picture of. You aren't supposed to separate the two, so you have to balance two heavy, awkward-shaped units like a clown juggles a gallon of milk and a sword.
I did my best, though, and by the time Justin arrived, I had a mounting set-up for the pump ready; the autopilot computer, bus and converter mounted; and a lot of the wiring ready. After arriving on Friday afternoon and all during the next day, he went into tornado mode to get the ram and pump installed, and the rest of the instruments working, with priority going to getting the instruments operational so that we could safely sail to Cape May the next day. Our biggest issues were trying to have the correct fasteners for various brackets – a huge bolt was needed for the ram attachment to the steering quadrant, we needed socket-head screws for the pump mounting plate that I had set-up because of the difficult access to where we wanted the pump mounted, and we needed an elongated nut to properly attach our rudder indicator to the steering quadrant within the manufacturer’s specified installation requirements.
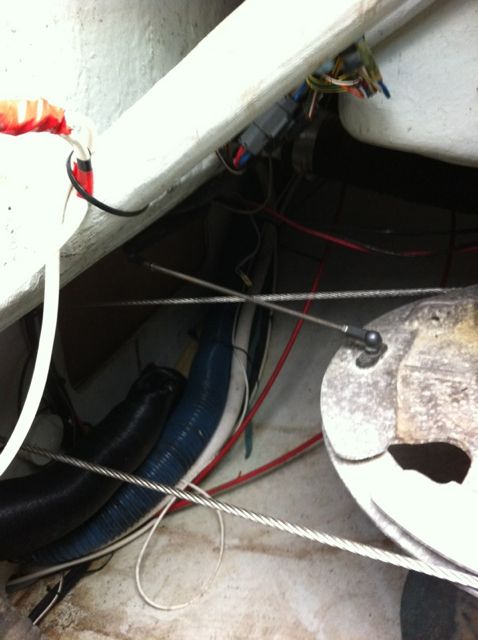
The skinny metal rod is the existing rudder reference. Of course, our new rudder reference had its own fittings, and of course, we could not line it up perfectly without finding an 1.5-inch long nut at Fawcett's to address the difference in height between the quadrant and where we were able to install the reference unit.
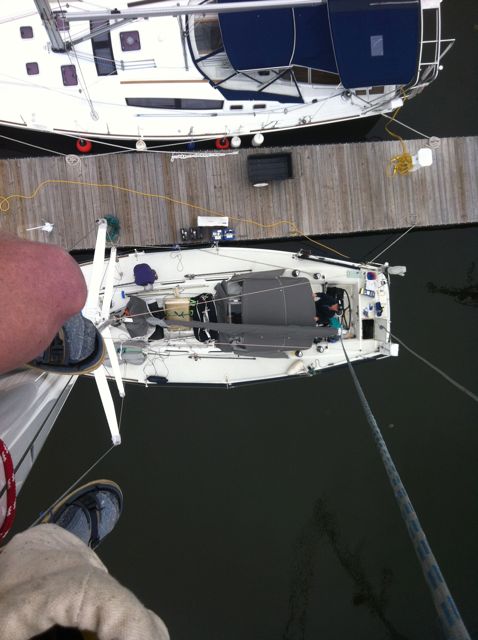
By the end of the day Saturday, we had instruments (speed, depth and wind) operational, thanks to a four-hour stint that Justin spent up the mast (4 hours is a mighty long time, and he stumbled a bit after returning to Earth, thanks to his butt going fully numb!). We got the autopilot working finally several days later. The only issue we had was with the depth display occasionally showing an error message – we could temporarily fix the issue with a reset, but we know think we need to specifically assign a placement in the system, based on suggestions by the NKE representative. The issue may have been associated with us using the instruments before completing the autopilot installation. We also are trying to troubleshoot our owner code for the true wind module that we purchased that will allow us to have both apparent and true wind calculated. We’ll deal with that in June. We’ll also post all the “final” pictures, as we somehow forgot to document that detail!
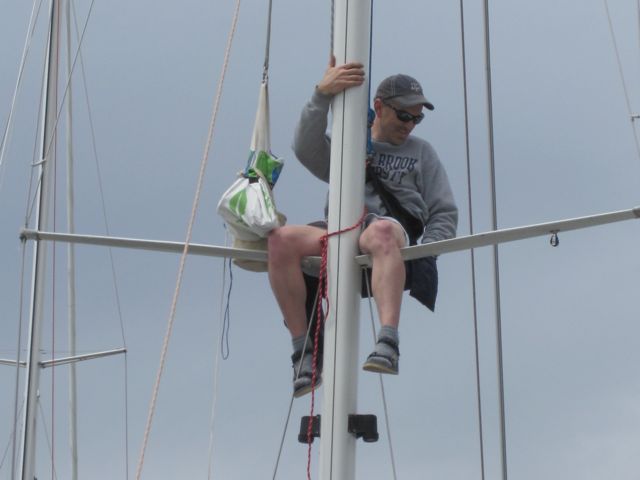
Justin set a new record for time spent up the mast - 4 hours. He replaced bulbs for the steaming, tricolor and anchor lights; installed the new NKE windspeed and direction indicator after removing the old unit; and did some rigging inspection and maintenance. Ask him what it feels like to have a numb butt.
Our current observations and thoughts about the NKE instruments and autopilot is that they are pretty logical and straightforward. There seems to be so much we can do – we’ll have a lot to play with and learn. The documentation and installation manuals were adequate, with only a few odd translations from French, and we had nearly instantaneous responses from the US rep when we emailed the few questions we had. We’re pretty optimistic that the system will be amazing once we work out these last few issues.
All in all, we’re happy that we chose to install it ourselves (and we saved over $5,000 from the quotes we received for contractors to do the installation on our behalf), and we both learned a lot about the boat and how the NKE system operates that should be invaluable in the future for dealing with the inevitable issues that arise.
2 comments
Leave a ReplyCancel reply
Sign up to receive blog updates
First and foremost, congratulations on a fantastic, if not hurried, list of accomplishments. I’ve always been a avid believer in the “DIY” principal mostly because I couldn’t afford others to do the work for me. The learning curve you acquired is priceless but even more important is you know exactly where to look and what to do if something fails or errors out. I am so impressed Chris with your talent at doing what you had to do before Justin arrived.
OK, I’ll bite…how does a numb butt feel, J-Man? Since you are returning in June, I’ll do my best to have those items I mentioned before shipped to the “Shearwater Holding Facility.” To reiterate, key items are as follows:
1. Dinghy anchor (Danforth and a cute little bugger)
2. Self-hoisting bosun chair (Like new condition with plenty of added line to get you to the top (Seychelles was 55′ waterline to top of mast) with a 4:1 purchase. Go slow and you’ll get there in no time.
3. Dinghy paperwork signed over to you as a gift.
4. Sunbrella material you sent me at one time, never used, sending back.
5. Odds and ends…you just never know when you need something unique. I think I still have some manuals but may have left them with the boat when she sold.
6. New dinghy motor rail mount purchased to accommodate a motor stand plan that failed…well…maybe failed. Ran out of time to do the complete job.
All together, I think it’ll all fit into 2 boxes. So let me know if it arrives OK. Again, you guys are the best at everything you do. I am proud of both of you and you have given me more food for the fodder when bragging rights about my daughters start up in conversation with my many friends that know about you guys (yes, I keep them informed at every turn).
Love,
Dad
Dad!!! Thanks so much for the comment and thoughts…I will send you an email…:)